|
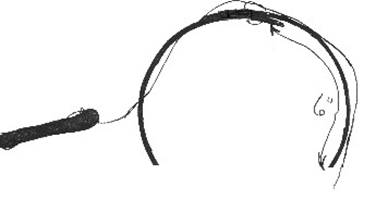
To free both hands for the initial tying, clamp the twig between your knees with the ends uppermost. Tie a knot around the two twig ends. Allow a 6" tail to remain.
Tie a second knot on top of the first (without going around the twig).
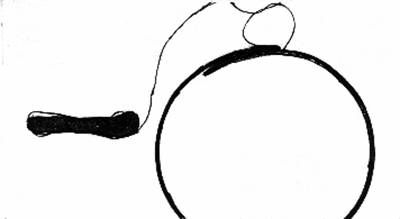
Tie a "half hitch" around the twigs by making a loop and passing around the twig and back through the loop.
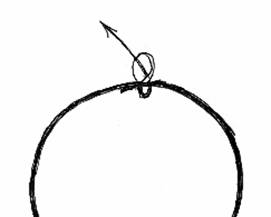
Now tie a half-hitch around the KNOT with the shuttle thread by making a loop above the knot, passing down between the twigs toward the center of the ring, up between the twigs, and through the loop. Pull the half hitch tight with a snap of the wrist.
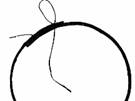
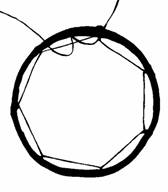
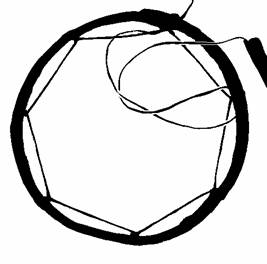
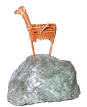
Tie both threads together and pass the tail down between the twigs, around the knot, and back up between the twigs. Cut off the tail close to the twig. Pass the shuttle thread down between the twigs and pull it back against the knot. Keep the thread against the knot as you begin the next step. Your first loop on the twig will pull the thread against the knot. Lay the thread over the twig so that it spills over the edge like a waterfall, and bring the shuttle up between the wood and thread. This is a self-locking loop. Always come up behind the point where you went over the ring. You will need to adjust the distance between the points using the template:
There are
seven points around the circumference of the weaving: the first is the
beginning tie around the ends of the twig, then seven self-locking loops.
Each of the seven line segments should be very nearly the same length. The
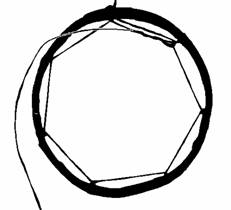
last loop goes You must keep the loops from sliding and loosening by pinching the last loop against the twig with the thumb and forefinger of one hand while the other hand plucks the shuttle from between the fingers to weave the next loop.
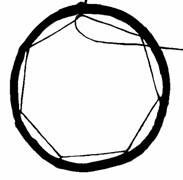
Pull the sinew against the far side of the, up and over to the near side of the knot. This holds that point from being pulled toward the center.
When the sinew is inside the circle again, spiral it around the line segment two times. Pulling the spirals back toward the knot creates a spacer that holds the sinew away from the previous set of line segments keeping the second set parallel to the first.
Pass the shuttle down between the twig and sinew on
the FARSIDE of the first point and bring it up on the NEARSIDE of the
point. I like to do my weaving from the topside to the underside and up
topside again.
Then go over the loop and in through the BACKSIDE of
the loop. DO NOT GO THROUGH THE LOOP AT THE POINT. That would create a
knot instead of a sliding loop. The loop made correctly creates a spacer
between line segments. Always go around the backside of the loop and
TOWARD THE LAST POINT.
Keep reminding yourself by saying,
“DOWN
THE FAR SIDE, UP THE NEAR SIDE, AROUND THE BACKSIDE, TOWARD THE LAST POINT”.
Pulling the sinew toward the last
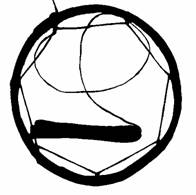
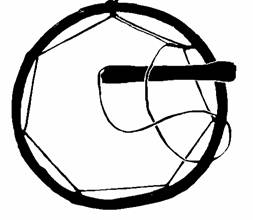
First draw the sinew back toward the previous loop and then forward toward the next point. Repeat this process with the next point and the next until you have completed another cycle as in the picture below.
Only use enough tension to create straight lines. Too much tension will warp the weaving and too little will make a sloppy, floppy weave. As you shift your pinch from the previous loop to the newly created loop it is very important to temporarily pinch the sinew onto the twig with your weaving hand so that the tension can hold the weaving in place.
See Real Dream Catchers' links This is a crazy world. What can be done? Amazingly, we have been mislead. We have been taught that we can control government by voting. The founder of the Rothschild dynasty, Mayer Amschel Bauer, told the secret of controlling the government of a nation over 200 years ago. He said, "Permit me to issue and control the money of a nation and I care not who makes its laws." Get the picture? Your freedom hinges first on the nation's banks and money system. That's why we advocate using the Liberty Dollar, to help change the monetary and banking system. Freedom is connected with Debt Elimination for each individual. Not only does this end personal debt, it places the people first in line as creditors to the National Debt ahead of the banks. They don't wish for you to know this. It has to do with recognizing WHO you really are in A New Beginning: A Practical Course in Miracles. You CAN take back your power and stop volunteering to pay taxes to the collection agency for the BEAST. You can take back that which is yours, always has been yours and use it to pay off your debts. And you can send others to these pages to discover what you are discovering. Disclaimer: The statements on www.real-dream-catchers.com have not been evaluated by the FDA. These dream catchers are not intended to diagnose nor treat nor cure any disease or illness © 2007, Allen Aslan Heart / White Eagle Soaring of the Little Shell Pembina Band, a Treaty Tribe of the Ojibwe Nation |


 Get
a course to promote your business online, explode your sales
Get
a course to promote your business online, explode your sales Get
software to promote your business online in less time
Get
software to promote your business online in less time